Sample Activities
The White House for Kids
Why Is the President’s House White?
Many Americans have learned that the White House got its name after the War of 1812. A legend says the president’s home was painted white to cover up burn marks. But like many legends, this one isn’t true. The walls were already covered by whitewash when the building was under construction. Why?
The sandstone was porous, meaning it absorbed water. In the winter, this was especially problematic. The water absorbed by the stone would freeze and thaw, creating cracks the same way potholes form in roads. The whitewash sealed the stone to minimize these problems. You can mimic the whitewashing procedure—and see why it mattered.

You’ll Need
- Old newspapers
- Small block of green floral foam, 2 inches by 3½ inches by 3½ inches
- Ruler
- Plastic knife
- Acrylic indoor/outdoor paint (from a craft store)
- Foam paintbrush
- Liquid measuring cup
- 2 similar-sized bowls
Protect your work area with newspapers. Cut the foam into two equal pieces with the plastic knife; set one aside.
Paint five sides of one piece of foam carefully, ensuring smooth coverage. (Don’t paint the rough side where you cut the foam block in half.)
When the paint dries, pour one cup of water into each bowl. Place the unpainted foam in one bowl; hold it down. What happens to the foam? The water?
Insert the painted block in the other bowl, unpainted side up. Submerge the foam, but do not get the unpainted side wet. What do you notice? Do you see why builders decided to whitewash the sandstone?
Lighthouses for Kids
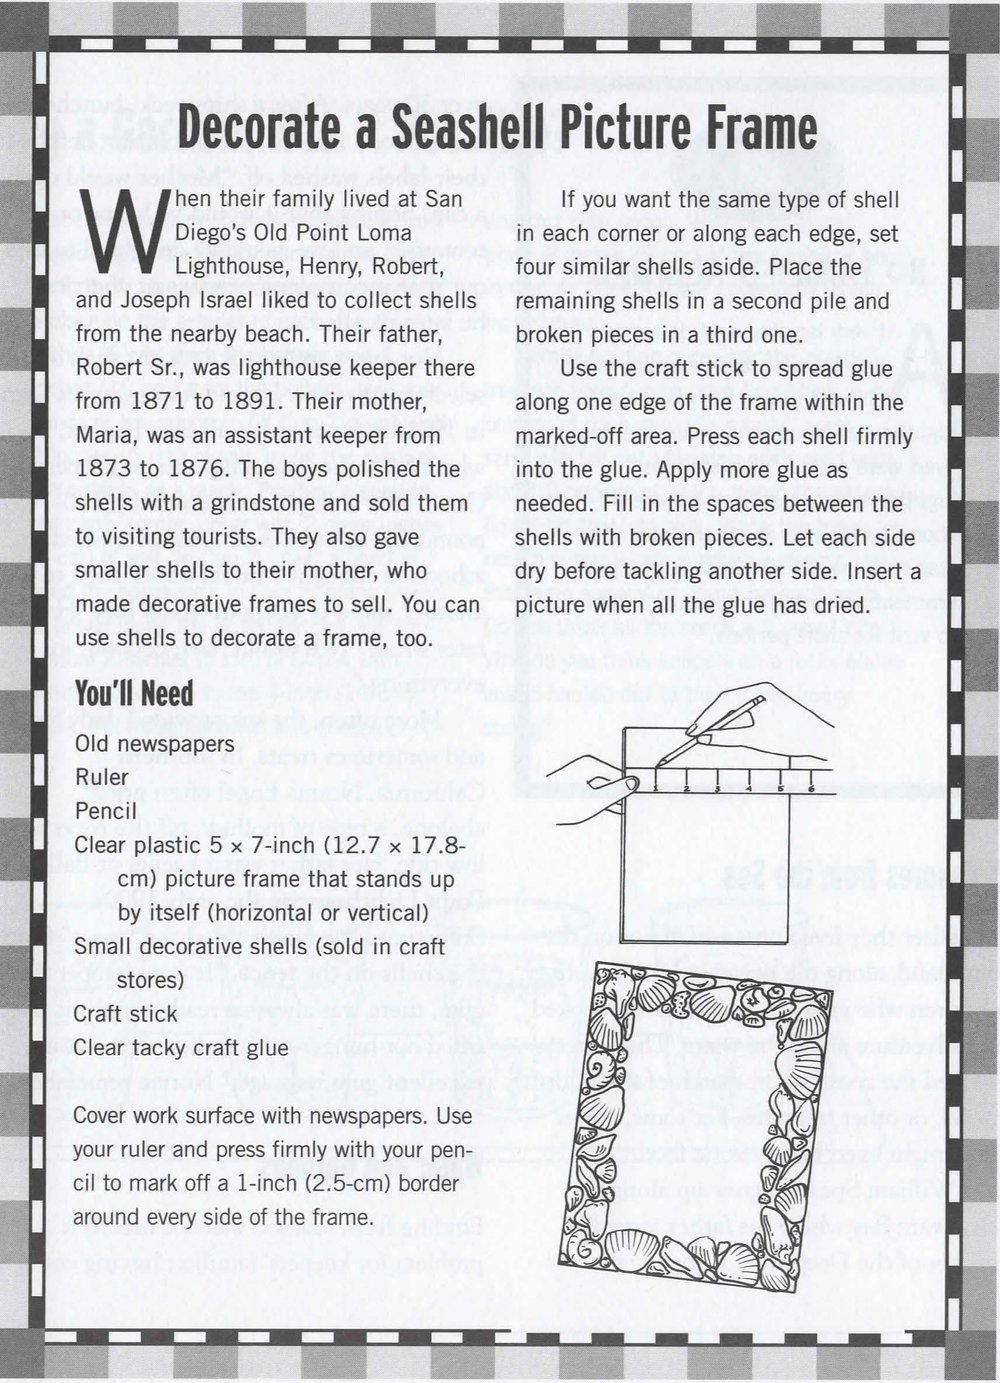
Decorate a Picture Frame with Shells
When their family lived at San Diego’s Old Point Loma Lighthouse, Henry, Robert, and Joseph Israel liked to collect shells from the nearby beach. Their father, Robert Sr., was lighthouse keeper there from 1871 to 1891. Their mother, Maria, was an assistant keeper from 1873 to 1876. The boys polished the shells with a grindstone and sold them to visiting tourists. They also gave smaller shells to their mother, who made decorative frames to sell. You can use shells to decorate a frame, too.
 You’ll Need
- Old newspapers
- Ruler
- Pencil
- Clear plastic 5 × 7-inch (12.7 × 17.8 cm) picture frame that stands up by itself (horizontal or vertical)
- Small decorative shells (sold in craft stores)
- Craft stick
- Clear tacky craft glue
If you want the same type of shell in each corner or along each edge, set four similar shells aside. Place the remaining shells in a second pile and broken pieces in a third one.
Use the craft stick to spread glue along one edge of the frame within the marked-off area. Press each shell firmly into the glue. Apply more glue as needed. Fill in the spaces between the shells with broken pieces. Let each side dry before tackling another side. Insert a picture when all the glue has dried.